How to automate Microsoft Teams repackaging
21.05.2019 Update: Microsoft changed Teams MSI to be able to install per-machine. Read about it here:
In this article, you will learn the exact steps necessary to create an automated repackaging process for Microsoft Teams as an example. The best thing about this solution and script is that, with a few adjustments, this process can be used to automate any other application repackaging and configuration process.
Prerequisites
- Virtual machine – Windows x64 7/8/10 (Windows 7 x64 is recommended due to less OS background noise)
- Any MSI repackaging software that has command-line support
Step ONE
Clean Windows 7+ virtual machine installed. There are several options available for this:
- VirtualBox (open source)
- Hyper-V (built-in Windows)
- VMware Workstation Pro
Step TWO
Get an MSI repackaging software that has command-line support. Most of the enterprises have this software already, but not all have command-line support that allows an automated repackaging process. In this example to automate the Microsoft Teams repackaging process, we will use Master Packager. However, we want to make packaging easy and fast for everyone. That is why we have created an auto-packaging script in PowerShell that can be adjusted for any packaging tool you may have (as long as it has command-line support) and is not only limited to use with Master Packager.
Step THREE
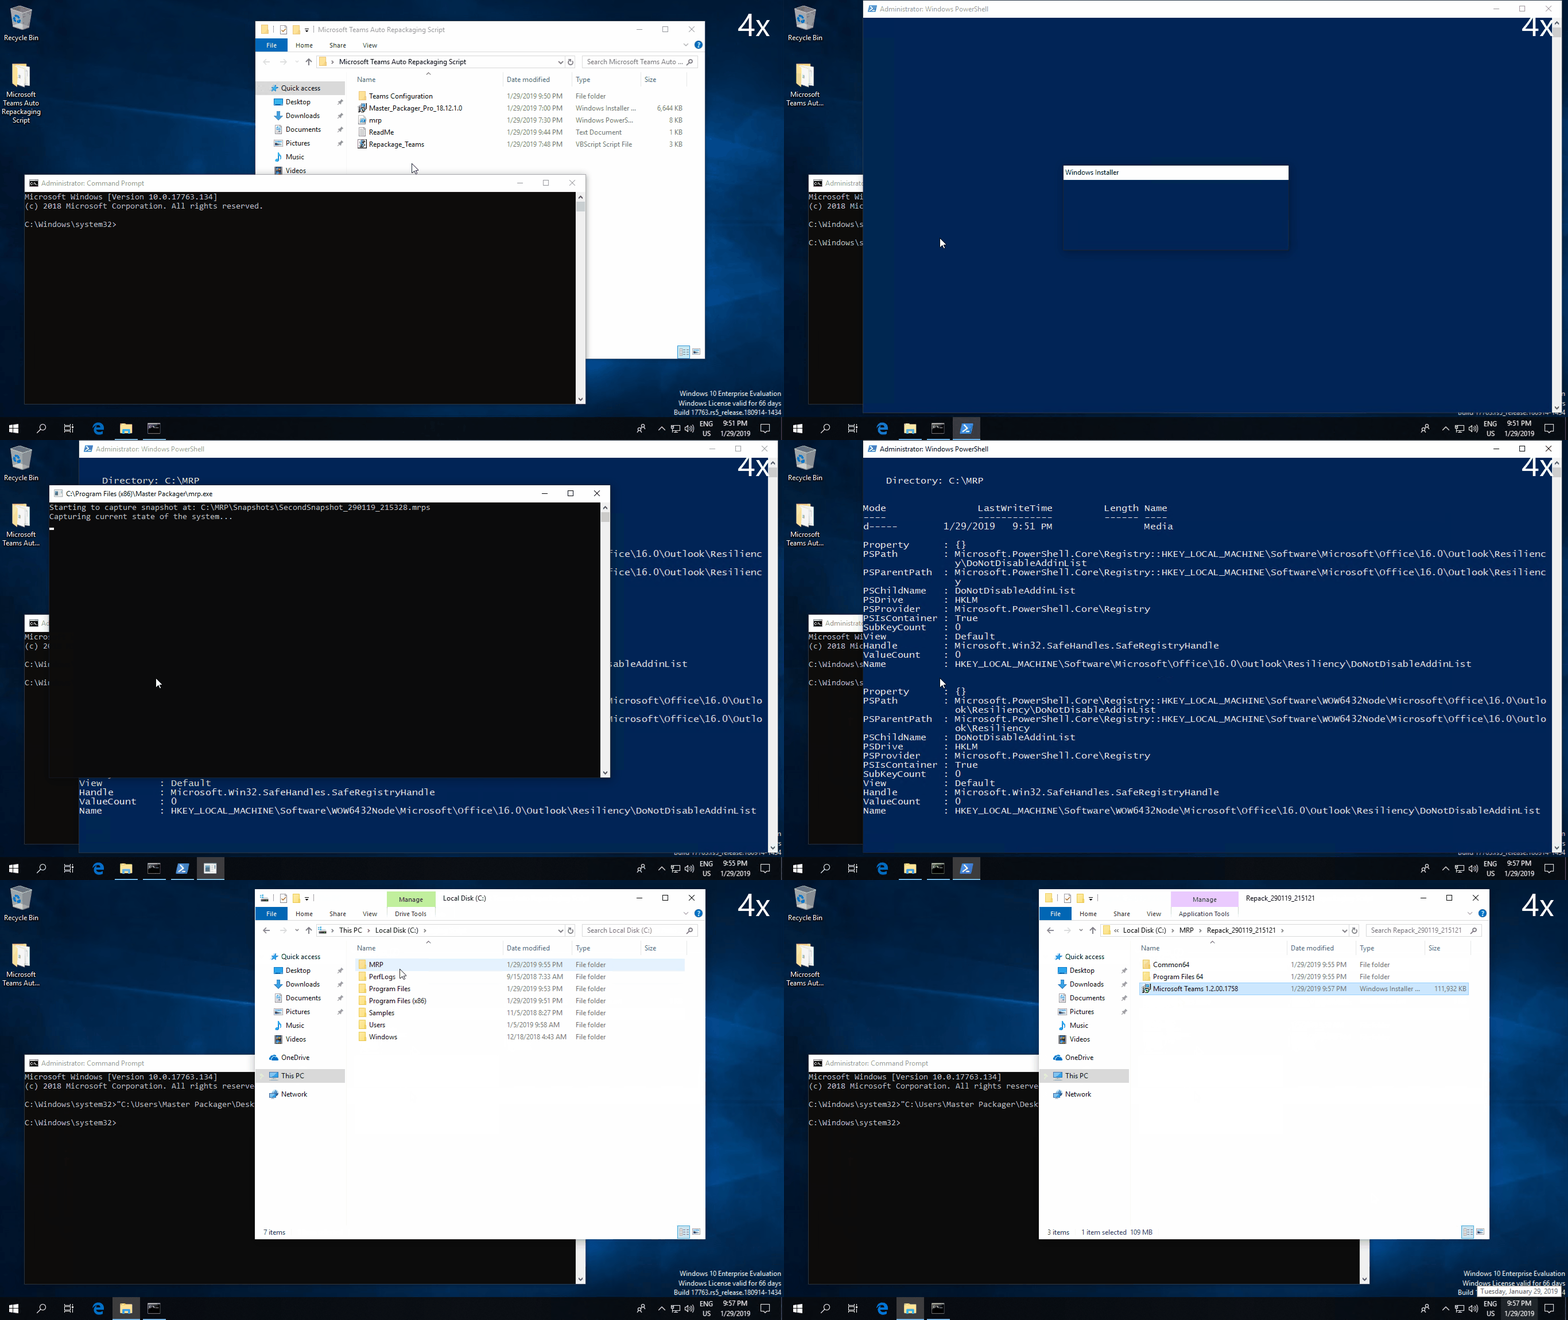
Run the script by launching VB Script placed next to the PowerShell Script. It will do all the work for you. You will get the latest available Microsoft Teams version repackaged in MSI format as a per-machine application and configured ready to use for enterprise deployment systems (SCCM/Intune/etc.).
Always download the latest Master Packager Pro MSI from https://www.masterpackager.com/pricing website and replace existing MSI in Auto Repackaging Script - Microsoft Teams folder.
Activate Master Packager by changing the e-mail address and license key inside the Repackage_Teams.vbs file. You can buy or get a trial license for testing purposes only from https://www.masterpackager.com/pricing in seconds.
How does the script work?
In the installation directory of Master Packager (C:\Program Files (x86)\Master Packager\Auto-Repackaging script sample), there is a PowerShell script that is used to repackage applications automatically. We took this script and adjusted it for Microsoft Teams.
-
First, the script installs Master Packager MSI and activates the license.
-
The script also copies the custom file/registry exclusions and templates that were created specifically for Microsoft Teams. File and registry exclusion can be updated by yourself in “Teams Configuration\Exclusions” folder. Templates are created with Master Packager function templates that can automate work with MSI files.
-
The next step is to download the newest version of Teams and create a setup.json file next to it that contains the following content: { “noAutoStart”: true }. The JSON file is required to stop Microsoft Teams from launching after the installation.
-
Now the script is ready to create the first snapshot.
-
Next, install Teams and wait until the desktop shortcut is created, because the Teams installer returns the exit code before it has finished installing.
-
After that, it is necessary to move the files from the user’s profile to %ProgramFiles%.
-
Then we delete some HKCU ProgIDs, as they don’t register in HKLM if they are present in HKCU.
-
The next step is to register both 32-bit and 64-bit Microsoft.Teams.AddinLoader.dll files. It is also necessary to add some HKLM registries for the Outlook add-in.
-
To continue, we remove the desktop shortcut and some folders from the user profile.
-
Then we modify the shortcut to point to the correct target.
-
Finally, we can take the second snapshot and build the MSI.
-
When the MSI is built, we apply a custom PowerShell template that sets the ProductName, ProductVersion, Manufacturer and ARPPRODUCTICON properties.
-
The last step is to rename the package to a friendlier name.
Ready MSI is accessible in the “C:\MRP\Repack” folder.

How should the script be used?
There are many ways to implement and use this solution. It is possible for you to manually start a Virtual Machine (VM), copy the required files to the VM and simply launch the VBScript. However, the preferred method would be to create a snapshot on the VM that has a scheduled task that will run the script when the VM boots. You can even go as far as to copy the finished package on a network share and turn the VM off when that is done and import ready MSI package directly in SCCM or Intune.
P.S.
Remember that even if the solution produces a usable package, it should always be verified before deploying to production. There might be some trash files/registries left in the package. The application functionality must also be verified as we cannot guarantee that Microsoft will not change the current installation logic and break something in the process.

